 |
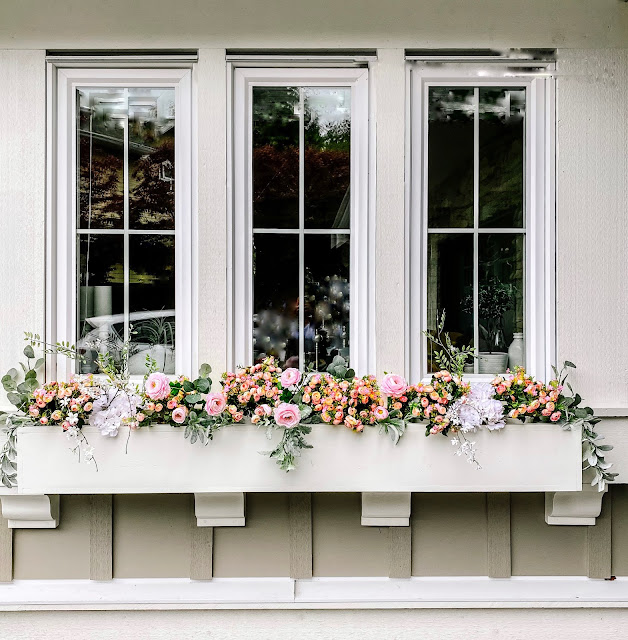
| Classic Window Box |
ACTIVE WORK TIME : 2 hours ( plus paint or stain time if finishing )
DIFFICULTY : Easy to Moderate ( working with saws)
MATERIALS :
- 1x10 (16ft + more for longer box) ** this is what we had on hand
- 2x4 ( 8ft ) ( top trim ) ** or any scrap you have that are long enough
- wood glue
- construction screws ( to attach to sill)
- clear plastic sheeting
- gravel/soil/plants
TOOLS:
- Chop Saw
- Table Saw
- Nail Gun and Nails
- Drill
INSTRUCTIONS:
** I learned that a 1x10 is actually 1 x 9 1/4' so I made my own box dimensions based on this.
Whatever your wood is to start you may have to modify abit! Especially if using scrap
 |
| Starting Supplies found in Shop |
1. Cut 3 pieces to width of your window ( or length of box desired ) Mine is 54" wide where I want it centered on the window.
 |
| Cut lengths |
2. Rip 1.5" off of one board on table saw ...that will become your bottom
 |
| More cutting |
3. Ends : Measure and mark end using your cut pieces- 7.75" x 8.5" 2 pieces
4. Using your chop saw cut end pieces
5. You should have 5 pieces ready for your box: Bottom Front Back and 2 Sides ... heres my fancy render because if you are anything like me none of the above matters - just show me a drawing or picture !!
** if you want a center support / divider then trim another small piece to fit.
( I didn't but probably a good idea )
 |
| This is really all you need! |
6. Glue and nail the back to the sides and then the front to the sides ** make sure your glue is not cold!!
 |
| Warm your glue! |
 |
| Wood glue is my friend! |
 |
| And so is the nail gun! |
7. Push the bottom into the box and nail in from all sides spaced at 4" all the way around
8. Glue and nail center support if using
9. Rip your trim wood into strips 1.5 " wide- front length and side widths ( 3 pieces)
10. Use those strips to build a mitred frame for the top with 1/4" overhang and install one piece at a time nailing into the box . Do not trim wall piece
 |
| Mitred edge trim |
 |
| Finishing |
11. Done! Fill and sand any rough spots. Ready to install ( stain or paint at this point )
12. Screw into your siding ( finding studs) under the window trim
 |
| Classic Window Box |
13. Drill holes along the bottom for drainage
14. Line with plastic and some gravel and plant your pretties!!
** full disclosure on mine...its filled with faux stems currently. At some point I will plant but I love to change up the colours and greenery so I'm giving myself that leeway for now!
Here's a link to some really inexpensive faux options if you want to go pretty with zero maintenance!
If you make one I would love to see!! Tag me over on IG @remarkablemoderncottage


Add your comment
Love to hear what you think! And don't hesitate to ask questions regarding anything posted here!